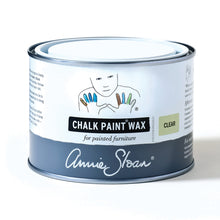
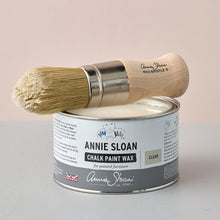
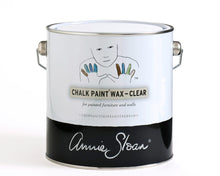
Clear Chalk Paint Wax - Formally known as Soft Wax - THIS IS THE SAME PRODUCT! Just new branding! This is the LARGEST container of Clear Wax that Annie Sloan offers. It has the consistency of soft margarine in a tub so it is easy to apply, is completely colorless, and has very little odor. It is water repellent so can be used on dining room tables and kitchens. Wipe clean regularly and use a spray cleaner for tough areas - but make sure it does not contain a de-greaser - which will hurt the wax.
We recommend ALWAYS using Annie's Wax with her Chalk Paint® with her Chalk Paint® for INDOOR projects!
Do not use wax for pieces that will be stored or used outside in the sun or where they can get rained on!
If wanting to apply this over Acrylic paint or Latex - keepin mind, that is water-based and the 'regular' cold wax medium contains a solvent, which doesn't make the two a good match. This is not ideal for Acrylic or Latex paints since they are not porous.
The 500ml tin of clear wax will cover 430 square feet or more. You may be able to get more out of the tin depending on your application.
And we suggest applying the paint, waxing it and then sanding it for the best results.
How Much Wax Do I apply?
First, take note: we are not icing a cake! We are waxing furniture. So, very thin uniform coats are best. Just like when you put moisturizer on your skin - you do not put a thick coat on, but rather a THIN coat and rub it in - so that it will be absorbed into your skin. This is the same approach when waxing furniture.
Here is what I do:
1. I take a plastic spoon and a paper plate. Using the backside of the spoon, I take a good tablespoon amount of wax out of the tin and put it on the paper plate. (Place the cover back on the tin of wax until you need more)
2. I use my wax brush and pull some of the wax from the glob (for lack of better words) on the paper plate. Only the tips of your wax brush should have wax on them - and not a lot!!!! A little goes a long way! Again - you are not icing a cake where you want a generous amount of thickness. We are applying the wax very thin- pressing uniformly with steady pressure - but not so much that you are bending the bristles on the wax brush.
3. For most pieces (except when going for that Rustic look or when you have a textured piece) I usually apply the wax in the same direction as my painted brush strokes. If I was doing a dresser top- I would start at the back reaching across while standing in front of the piece and as I apply the Annie Sloan wax I work my way toward the front as so I don't lean into a previously waxed area. You will see where you waxed prior because it does deepen the hue of the paint.
4. After a few strokes from one side to the other with the wax brush, I then take a lint free cotton t-shirt (an old one from my husband or an old sheet) and I wipe off the residual wax with one or two strokes in the same direction as I just waxed. (I am not buffing the wax at this stage! Merely just removing or incorporating any small wax "crumbs" that may be present.) Again - just one or two swipes across the whole area in one sweep, and that is it.
5. Resume waxing the next area.
6. The wax will cure (meaning no longer be tacky to the touch within a short time, maybe an hour or two?) However, a variable in the cure time is the temperature and humidity where you are located. Is it is humid and cooler - cure time will be longer. If it is taking a long time and your wax is still tacky and you are not in the rain forest- reread my warnings above regarding applying the wax thin!
7. Once the piece is no longer tacky- if you want to have a shinier finish- buff your piece. If you like it as is- then you are done! It does not take much rubbing and the piece will be quite shiny- so pay attention and have good lighting so that you do not overdo it.
8. Remember NO WAX when painting pieces for outside.
9. Surfaces that will get serious use (wear and tear) like tops of dressers and tables should receive 2 to 3 coats of wax. Follow procedure above, always allow wax to dry between additional coats.
I will always lead my customers on a path to get the best value from their purchase. If a person walks in and is describing an application where another product would be better- I let them know! Now when it comes to tools - in the sense of brushes, I strongly believe that a wax brush is a necessary purchase if you plan on doing multiple pieces. I understand that they are not inexpensive, but if you maintain them, they will last forever and will make your waxing process much faster and from a cosmetic perspective will significantly improve your application! I always say this is similar to applying make up. I honestly don't think the applicator you choose for putting on eye shadow is a big deal- but try putting blush on with a skinny brush versus a nice big soft brush and you are going to look ridiculous. Invest in a wax brush and get a professional quality finish. You will not regret it.
Clear wax is quite cool in that you can add some Chalk Paint® to the wax to tint it. For example, use Antoinette Chalk Paint® in the clear to make pink wax or ....if you want to darken the Dark Wax, consider adding some Aubusson Blue Paint to make the dark wax closer to black.
As noted in a post earlier, the waxes can become very soft in heat, so store them in a cool place. You can put in refrigerator for short time if needed. The wax is the consistency of soft butter. Never use a heat source to warm your wax!
This furniture wax will rejuvenate, restore the shine, and protect all interior painted and wooden surfaces.
It is important to understand that once you wax a piece of furniture, you cannot polyurethane over it! It will eventually cause a quality problem, I guarantee that!
Consider taking a class from a stockist to learn all the ways to maximize using your Annie Sloan Clear Wax or for more terrific project ideas - we highly recommend Annie Sloan's book, "Quick and Easy Paint Transformations". It contains 50 Chalk Paint® projects that will inspire and instruct you.


